Learn How to Hold Yarn for Crochet
How to Hold Yarn for Crochet: Learn How to Crochet Lesson #3
Learn How to Hold Yarn for Crochet - Lesson#3
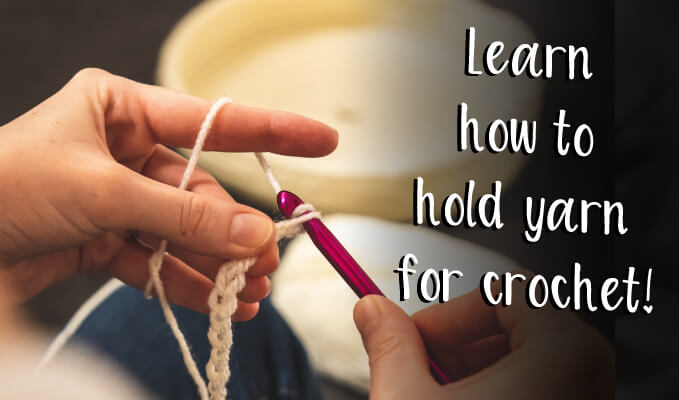
Understanding how to hold and control yarn is a valuable and essential skill to master when learning the beautiful art of crochet. There are several techniques for holding yarn, just like there are for holding a crochet hook. Although the holding methods may seem odd or clumsy at first, with practice, you'll come to appreciate the benefits of each. This chapter will allow you to perfect your skills and unlock your creative potential.
Is There a Correct Way to Hold Yarn?
There's no one-size-fits-all approach to holding yarn while you crochet, so don't stress about its position in your hand. While it might initially seem confusing, focusing more on controlling the yarn's tension rather than on the yarn's placement in your hand will make finding a style that works for you easier. This will make discovering a technique that suits you more straightforward and enjoyable.
To get all of my lessons on how to crochet, make sure to purchase a copy of my "Learn to Crochet With Me the Crochet Guru" Book!
After you buy the book, follow along with me as I guide you through the exciting journey of learning crochet! Click Here to Purchase My Book
What is Tension?
Tension, in crochet terms, refers to the amount of pull or stress applied to the yarn while working. The level of tension produced by the yarn hand dictates the tightness, looseness, and evenness of the stitches. The resulting look of the final crochet project is thus heavily influenced by the tension applied to the yarn while crocheting.
Which Hand Holds the Yarn?
The yarn needs to be held and flow through your non-dominant hand. Your non-dominant hand is called your “yarn hand” in crochet terminology.
Note: I am right-handed, so I always hold my yarn in my left hand.

Understanding Yarn Terms
In crochet or yarn terminology, you will often hear or see “working end” and “tail end.” So, what do these words mean?
The "working end" of the yarn is the yarn that is being used to crochet. This is the yarn being worked or pulled from the skein or ball of yarn.
The "tail end" of the yarn is the leftover yarn or, in other words, the yarn that is still sticking out when you are finished with your crocheted project. The tail end of the yarn is also the first thing you grab or pull when starting a new project.
Examples of Holding the Yarn for Crochet
#1 The Pinky Finger Hold
The pinky finger helps control the tension of the yarn as you crochet.
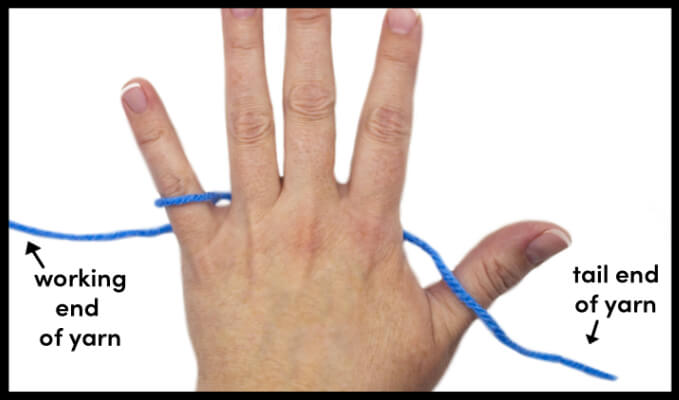
1. Start with your palm facing down.
2. Bring the "tail end" of yarn up between your pinky finger and ring finger.
3. Wrap the yarn around your pinky finger to form a loop.
4. Bring the yarn back up between your pinky and ring fingers.
5. Drape the yarn over your three remaining fingers (ring, middle, and forefinger).
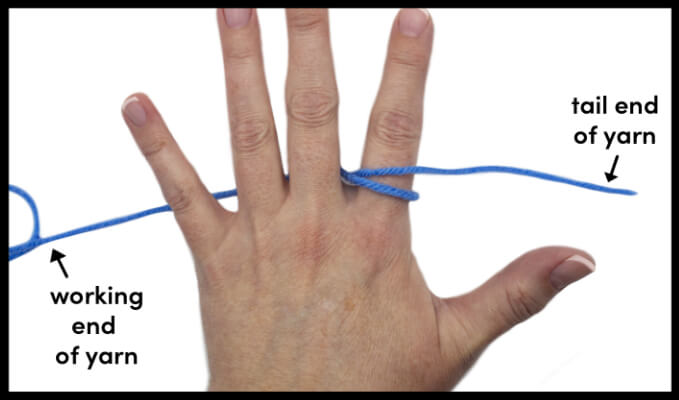
#2 The Forefinger Hold
The forefinger helps control the tension of the yarn as you crochet.
How to Know if Your Yarn Tension is Too Loose:
1. Your final crochet project comes out too big.
2. The yarn you are using keeps splitting.
3. You have difficulty grabbing and wrapping the yarn around your hook.
4. The stitches you make look floppy and uneven.
How to Fix Loose Tension:
1. Wrap the yarn through or around another finger to add more tension.
2. Try using the pinky or ring finger holding styles.
3. Bring your “yarn” and “hook hands” closer together.
4. Switch to a smaller crochet hook.
How to Know if Your Yarn Tension is Too Tight:
1. You struggle or cannot insert your hook into the crocheted stitches.
2. You struggle to pull your hook back through the crocheted stitches.
3. Your hands start to cramp.
4. Your final crochet project comes out too small.
How to Fix Tight Tension:
1. Concentrate on relaxing your fingers.
2. Remove the yarn from one or more of your fingers.
3. Try using the relaxed (no wrap) hold.
4. Switch to a larger crochet hook.
Tips On Holding the Yarn for Crochet
Understanding Yarn Tension
One of the most important aspects of crocheting is understanding yarn tension. The way you hold the yarn can greatly affect the tension, which in turn affects the outcome of your project. The key is to find a tension that is comfortable for you while also being consistent throughout your work.
When you hold the yarn, it should be taut enough to keep the stitches uniform, but not so tight that it causes your hands to hurt or cramp. Practice holding the yarn in different ways until you find what works for you.
Some crocheters hold the yarn with their fingers, while others use a yarn guide or a tension ring. Experiment with different techniques to find what feels most comfortable to you.
Using a Yarn Guide
When it comes to crocheting, a yarn guide is a handy tool that assists in achieving consistent tension. It clasps onto your finger and keeps the yarn stable while you work, making it particularly beneficial for those who find it challenging to maintain constant tension.
Placement is key when utilizing a yarn guide. You want to ensure it's comfortably situated on your finger and doesn't interfere with your crocheting. A few minor adjustments may be necessary to get it just right.
By using a yarn guide, you not only achieve uniform tension, but you also reduce the risk of hand fatigue. If you hold the yarn with your fingers, you may find that your hands tire quickly. A yarn guide can alleviate this issue by reducing the strain on your hands.
Taking Breaks to Prevent Fatigue
Crocheting can be a relaxing and enjoyable hobby, but it can also be straining on your hands and wrists. To prevent fatigue and strain, it is essential to take regular breaks while you work.
Set a timer or watch the clock and take a break every 20-30 minutes. During your break, stretch your hands, flex your fingers, and take a few deep breaths to relax your body and mind.
Remember that it is better to take frequent breaks than to push yourself to the point of injury. Your body will thank you in the long run!
Practice Makes Perfect
Consistent tension is key to creating beautiful, uniform stitches in your crochet work. The best way to achieve consistent tension is to practice, practice, practice!
Start by working on small swatches of fabric until you find a tension that feels comfortable and creates the desired look. Then, practice maintaining that tension as you work on larger projects.
Remember that it is normal to have some variation in your tension, especially as you work on more complex projects. The key is to keep practicing and to be patient with yourself as you learn.
To Do List: How to Hold Yarn for Crochet: Lesson #3
1. Try pulling the inside "tail end" of yarn from the center of the yarn skein.
2. Practice each holding style discussed in this lesson.
Great Job! You Finished Lesson #3 - How to Hold Yarn for Crochet
Click Here to Go to Lesson #4 - How to Make a Slip Knot for Crochet
Pin This Post!
Save this Learn How to Hold Yarn for Crochet - Crochet Lesson #3 to your Pinterest boards so that you can come back to it later.
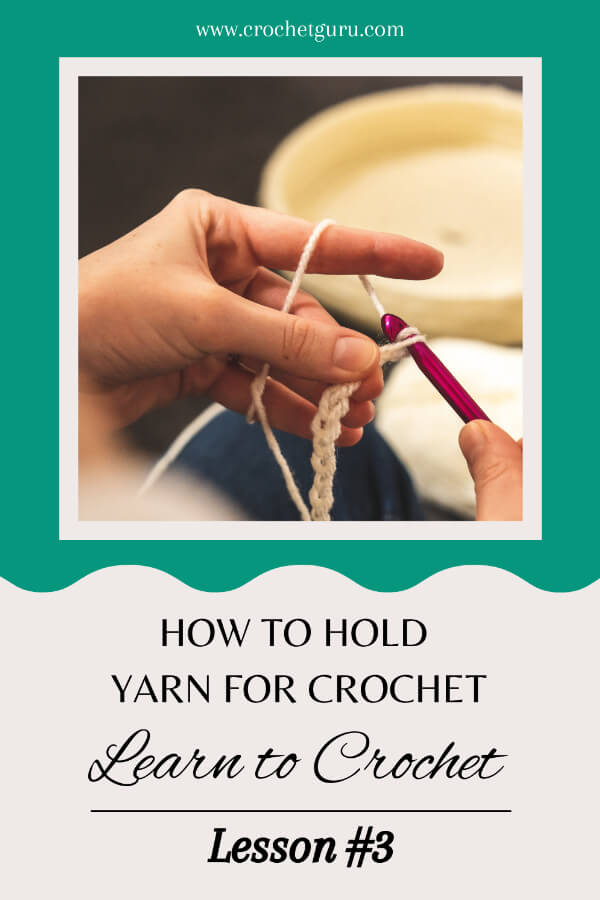
Discover the best way to hold your yarn for crochet with my easy-to-follow guide! Say goodbye to tangled yarn and hello to seamless stitches with this essential Learn to Crochet Lesson #3.
#crochet #yarnholding #learntocrochet #crochetforbeginners
For more information on how to hold the yarn for crocheting check out the Wiki How website.
Have Questions? Join My Crochet Guru Facebook Group!
I hope this article was helpful! If you have any additional questions, feel free to join my Crochet Guru Facebook Group. This group is for you to share pictures, ask questions, and help each other out!

